
The Power BI Service, available at powerbi.com, utilizes Azure Active Directory to handle its authentication. This is important to know for creating a custom Power BI application (in any language — C#, Python, etc.) that reads and write from the Power BI REST API. The one exception to this would be using the Power BI PowerShell cmdlets, as they internally, use their own registration mechanism.
This post rehashes and elaborates on the information I touched on in this post, but I wanted to have a dedicated post on just this topic that I could link back to.
So, what is an App Registration? An App Registration is an entry in Azure Active Directory that lets Azure Active Directory know that you will be using a custom application and associates permissions to that application. Additionally, with the addition of permissions, it associates the application to the Azure Active Directory Resource (aka https://analysis.windows.net/powerbi/api). When your application connects to Azure Active Directory, it provides an Application ID (a GUID generated during the registration process) and some form of authentication. Depending on the type of application, the authentication might be user credentials (Delegated Permissions) or a Client Secret or Certificate (Application Permissions).
Available permissions and capabilities are different between the two authentication types (Delegated and Application) so I’ll be using Delegated in most of my work as it is allows for much more flexibility. You only need to be an administrator in your Active Directory / Office 365 organization for some setup options (most notably for Application Permission setup) — otherwise, an application can be registered and used as a user without need of an organizational administrator.
First Time Registration via the Wizard
In a web browser, go to https://dev.powerbi.com/apps to launch the registration wizard and sign in with your Power BI credentials.

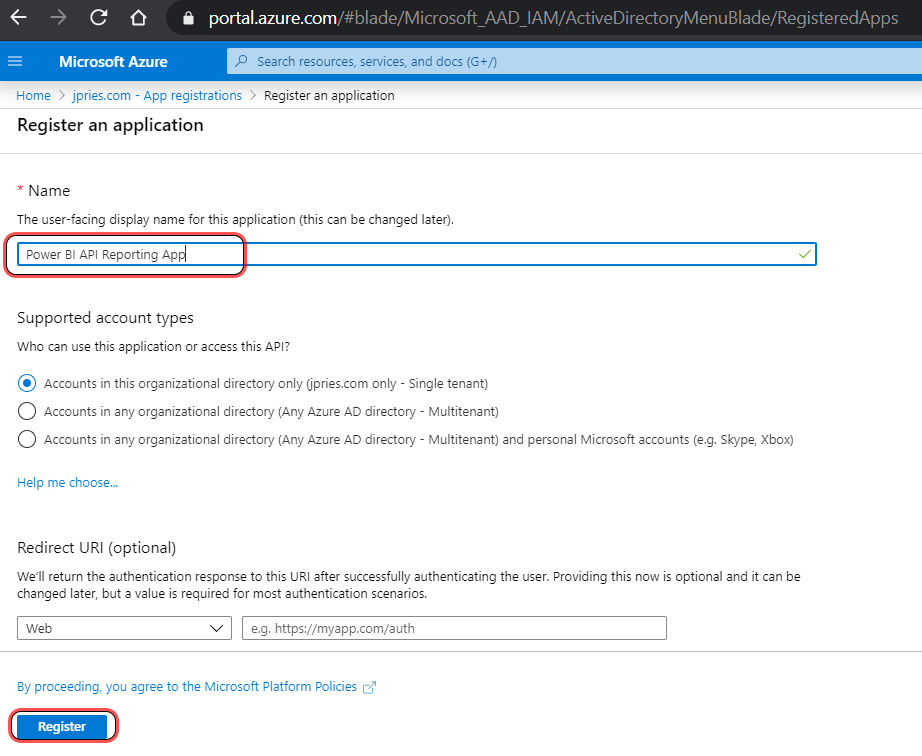
Next, enter an Application Name of your choosing. This name is primarily for display in the management portal.
Select Native for the Application Type (which is what we’ll use for Delegated Permissions as mentioned above)
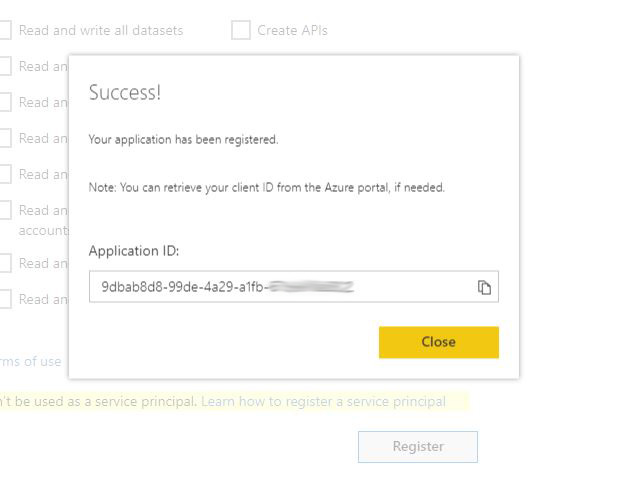
Select which permissions your application will be allowed to use. These can be changed later, but select at least one permission. I typically use all of the Read operations.

Press the orange Register button to complete the registration. Upon completion, you will be presented with an Application ID. Make a note of this, though if you lose it, you can retrieve it later via https://portal.azure.com (see below for instructions).
At this point, your registration is complete and you can start using your Application ID in your custom application. If your application will be using functions in the Admin section of the Power BI API reference, you will need the additional Tenant.Read.All permission, which must be granted via the https://portal.azure.com portal (see below for instructions).
First Time Registration via the Azure Portal
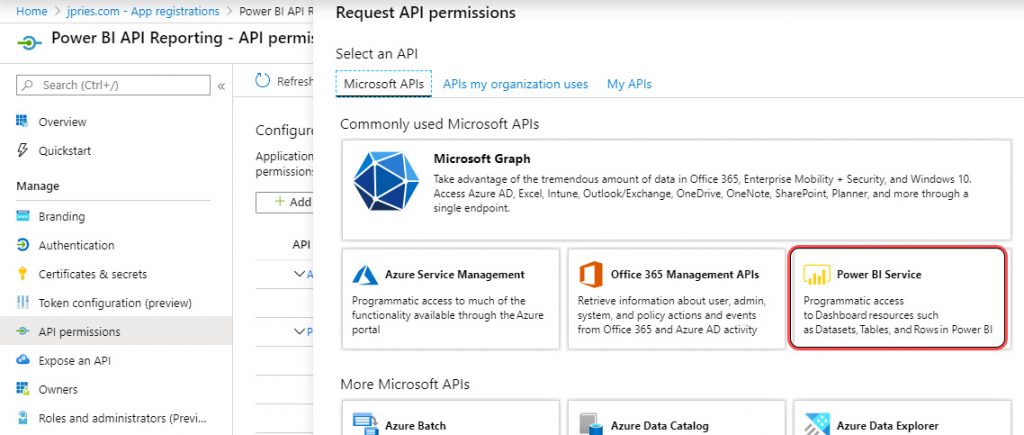
An application can also be initially registered via the https://portal.azure.com portal, though it is a few more steps than the registration wizard noted above. To manually perform a registration, follow the steps below.


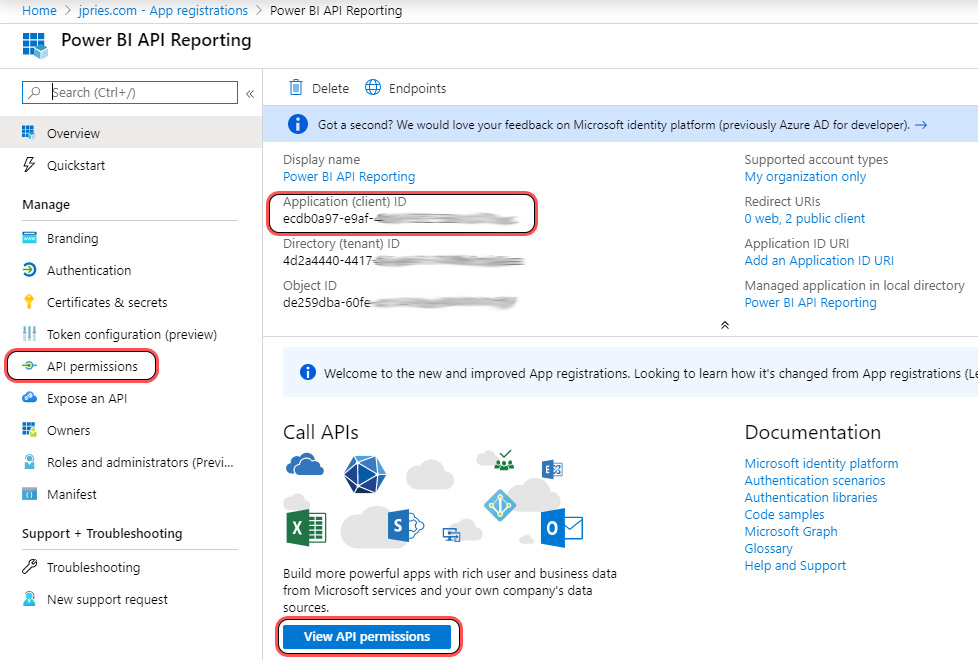
Lastly, the app will need to have at least one Power BI permission assigned to this. See below to accomplish this.
Modifying Permissions of an Existing App Registration
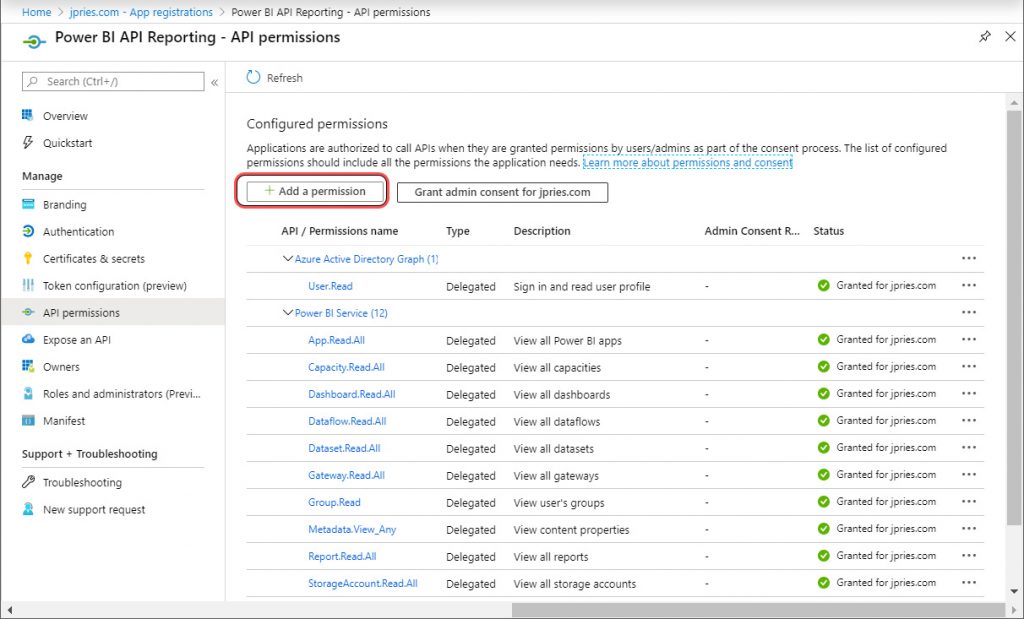
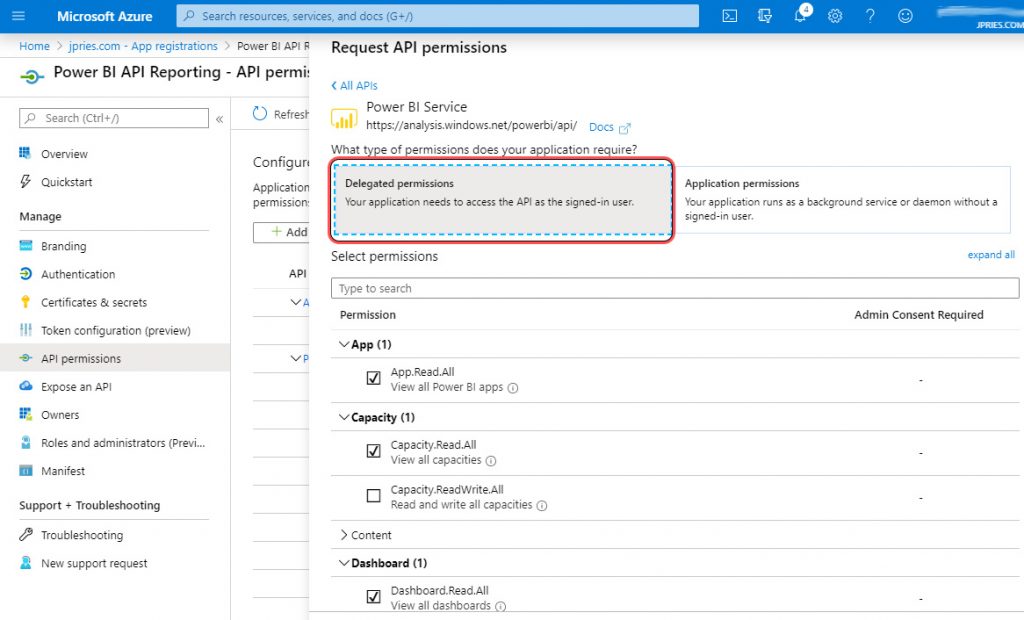
The last step in performing an App Registration, and a step that may need to be performed over time as needs change, is to assign permissions to the registration. These are permissions that the app will be allowed to do, providing the authenticating user also has the necessary permission.
Note that if you need the Power BI Tenant.Read.All or Tenant.Write.All permission, those must be assigned via this process.
To add, view, or change permissions, follow the below steps:
Conclusion
At this point, you should have an App registered, you should have the Application (client) ID noted, that app should have 2 native redirects configured, and the app should have at least one Power BI (Delegated) permission assigned.
With those completed, you should now be able to authenticate to Power BI with this Application (client) ID and valid user credentials using a program developed in your language of choice. For more information on developing a sample C# application, see this post.
Posts in Series
- Getting Started with the Power BI API – Querying Power BI with PowerShell
- Getting Started with the Power BI API – Querying the Power BI REST API Directly (with C#)
- Power BI On-premises Gateway Cluster Monitoring (Power Platform API)
- Power BI – Granting Permission to a Custom Application in Azure Active Directory (App Registration)
- Power BI API – Usage Monitoring – Activity Log (Audit Log) Activity Event Data
- Power BI API – Usage Monitoring – Tenant Usage Data with Power BI Activity Log (C# and PowerShell)
- Power BI API – Usage Monitoring – A Power BI Report for Tenant Usage Data