
In my previous post I explored the idea of accessing the Power BI API via PowerShell for the purpose of reading report inventory and other object and configuration information and then loading that exported data into SQL Server tables to query to answer various questions about an organization’s configuration.
In this post, I’m going to do the same thing, but taken to the next level (and going a bit overboard) by accessing the Power BI REST API directly with a C# application I wrote.
This post is targeted toward those already comfortable writing basic programs (C#, Python, or anything capable of making a web request and parsing a JSON response). If this isn’t you, there is no harm in sticking with the PowerShell cmdlets, they’re very capable and fast to get started with. For anyone else, let’s dive in!
For a language to use, I picked C#, with the goal of creating a basic command line based console application, as I was already pretty familiar with C# as well as how to make a web request, receive the response, and deserialize the JSON response into usable objects. My goal was to create a console application that I could run, which would then query the API for a full inventory of Power BI assets for an organization, then store the results in easy-to-query SQL server tables.
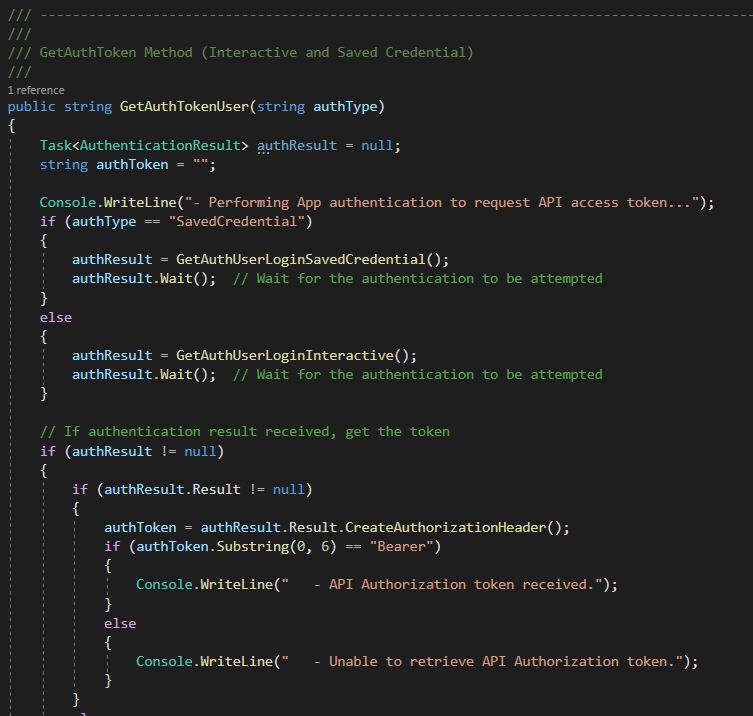
The first challenge I encountered (and even now still was probably the biggest challenge of this project) was authentication. With PowerShell, authentication was easy — run the “Login-PowerBI” (aka “Connect-PowerBIServiceAccount”) cmdlet, receive a graphical authentication prompt, and then the session is authenticated. With my C# application, I had a bit more work to do…
Authentication
From my research, it looked like I had two solid options for authenticating to the Power BI API:
- Use the PowerShell cmdlets — This is the first thing I tried, as it was pretty simple to do. This consisted of launching two PowerShell commands. The first performs the authentication and the second exports the token to a string which can then be included in all subsequent commands:
- Connect-PowerBIServiceAccount
- Get-PowerBIAccessToken -AsString
- Authenticate to Azure Active Directory (ADAL) with an interactive login or credentials stored in the application. This performs the authentication and then provides an authentication token string which can then be provided with all subsequent API requests.
Option 2 was my preferred option as my goal with this exercise was to not have to rely on the PowerShell cmdlets. But figuring out exactly how to do it was easier said than done. It took me quite a bit of trial and error to fit the pieces together — especially the nuances between doing a standard interactive login vs. saving credentials in the application and sending them without a login prompt. In figuring all of this out, Microsoft posted a very helpful sample application in the EmbedReport.aspx.cs file and the Utils.cs file. Additionally, between this post from Benjamin Perkins, this sample from Ravi Mandal, this post on saved credentials, and finally this Microsoft sample, I was able to learn how to use the AcquireTokenAsync function with Azure Active Directory which ultimately was the method I used.
Fortunately, you don’t have to go through all of that. I’ve pieced all those good nuggets of information together in my included sample application. Instead you can spend your time on the more interesting part — the data.
Some important notes on configuring authentication:
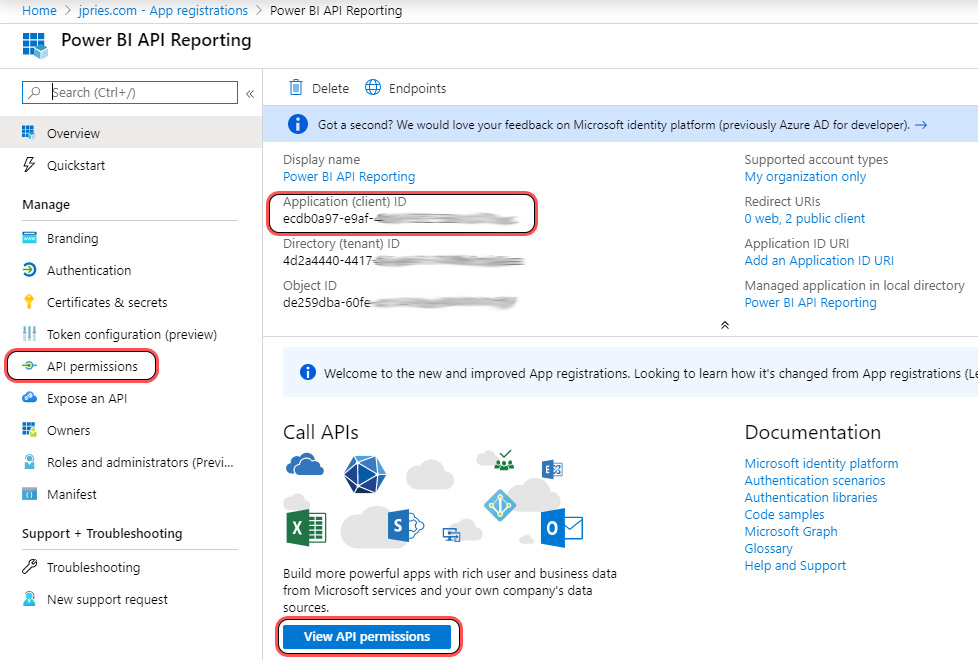
- While the sample code shows how to put the pieces together, it is still necessary to register your application in Azure Active Directory to be able to perform an authentication. I followed the steps in this article, which refers to this link, to create a registration for my program and grant it access to read Power BI data for my organization (note, an account to authenticate is still needed). It is important to register as a Native app and make a note of the Application ID that is generated. You can always go back and review the settings for the app via this link.
- Make sure to note the Application ID. Technically you also need the Authority URL, Redirect URL, and Resource URL — though these are known values not unique to the application.
- For this method, your application will require the Microsoft Identity Model Client library, which can be installed in Visual Studio via Nuget.

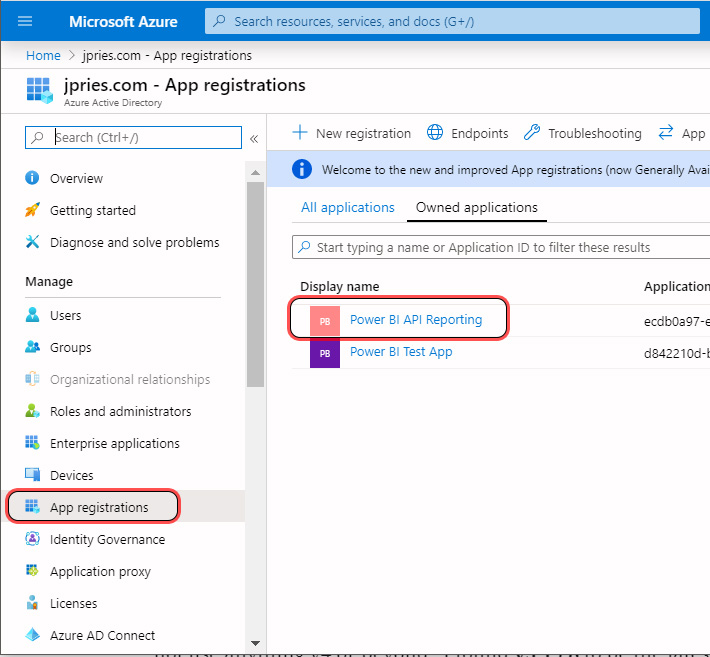
You can always revisit these settings (or create a new registration) later by visiting https://portal.azure.com then by selecting Azure Active Directory and going to the “App Registrations” section, finding your registration, then clicking on the App registrations button and viewing the API permissions.


I encountered an interesting quirk while troubleshooting authentication issues. The current version of the Microsoft Identity Model Client library (using the https://login.windows.net/common/oauth2/authorize AuthorityURL) to access the Power BI API doesn’t work. Instead, it is very important to not use anything v4 or beyond. I found v3.19.8 to be the latest v3 implementation and that worked great.

Data
Thankfully, after wrangling with authentication and getting a valid authentication token, handling the data is relatively straightforward.
The Power BI API Reference is well documented and ever expanding. The reference breaks the available commands into groups with a number of read and write functions typically in each group. For the purposes of this article, I’ve only used the few read operations — primarily for collecting inventory information about my environment. When getting started, I recommend starting with commands that start with the “Get” prefix.
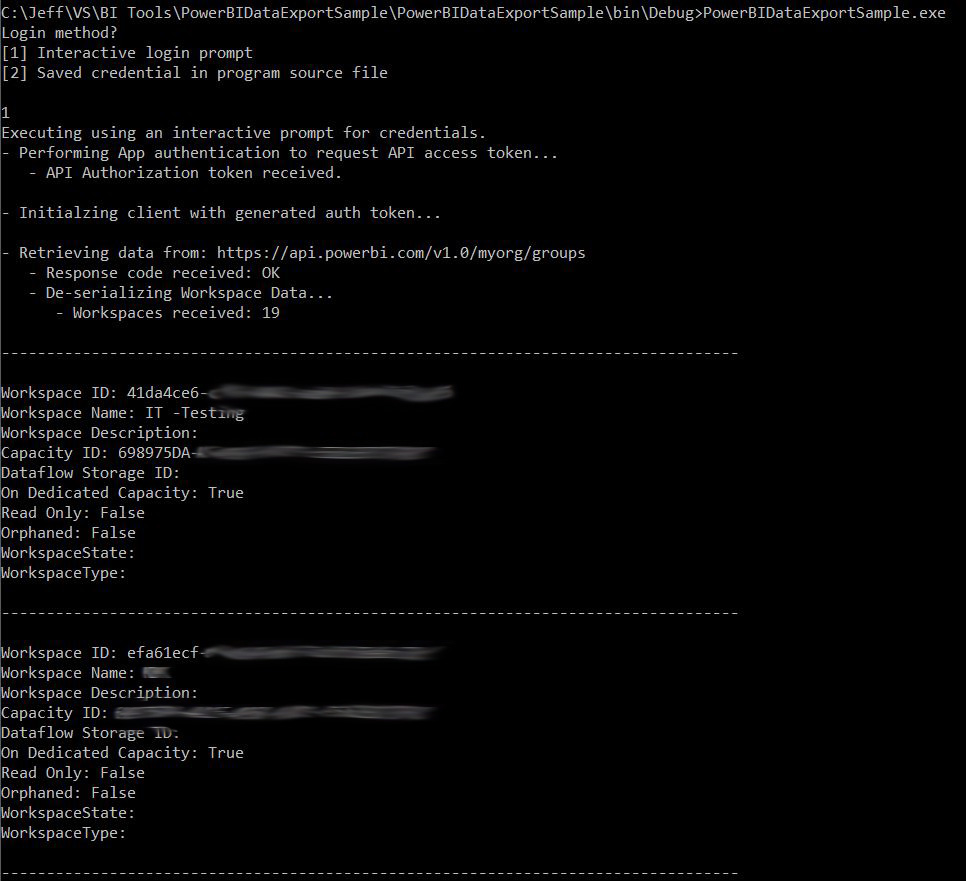
To get information about Workspaces, for instance, that can be found in the “Groups” group of the reference (this is the only one that isn’t named intuitively — reflecting a name change of the functions along the way.) The “Get Groups” function will return information for Workspaces in the Power BI Service for which you have access.
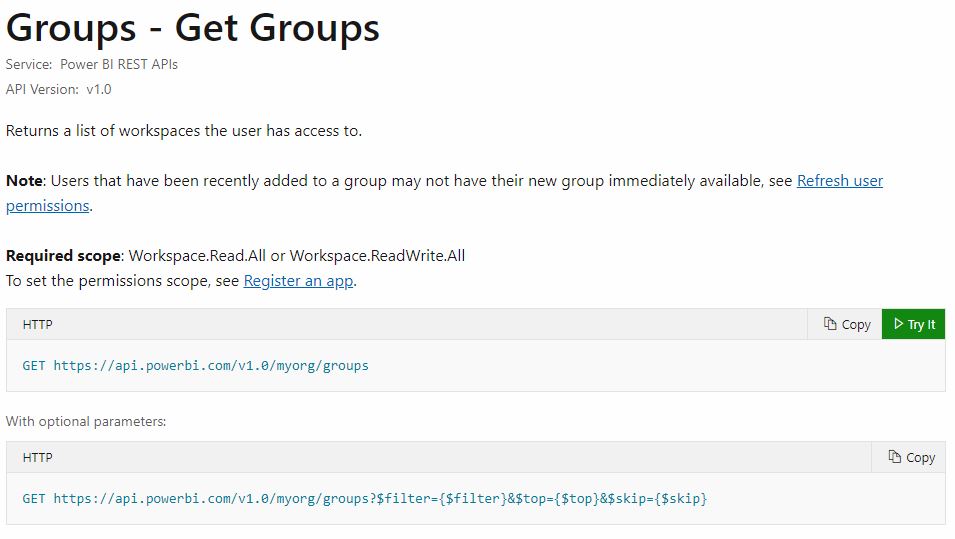
For each command, the method for submitting the request to the service is specified (in this case, and most, it’s the GET method) as well as the URI to send the request to. Many commands will also allow you to specify parameters in the request — for instance if you needed to get all of the datasets for a particular workspace (group), the workspace unique identifier would be a parameter.
Note on the top of each API page, it lists what application permissions are needed for the function. Most permissions can be assigned by a user. To use any function in the Admin section, the Tenant.Read.All permission is needed, which will require an Office 365 administrator to approve the permission grant.
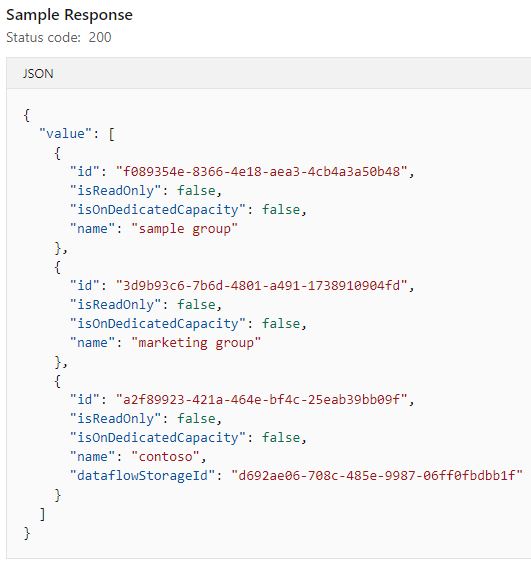
A successful request will return a JSON response which can then be de-serialized using your method of choice back into usable data.
In my sample C# console application, I make use of the HttpClient class, which is built into the .NET framework, to send the authentication request, receive the response, and then send a data request and receive the response. Additionally, I make use of the JavaScriptSerializer class (also built into the .NET framework) to de-serialize the JSON data response received into individual objects I can output to the screen.
Sample Application
To tie things altogether, I developed a very basic C# .NET console application, the Visual Studio Solution for which can be found here.
The application is fairly minimal with all of its configuration information stored in constants at the top of the main class source file, PowerBIDataExportSample.cs to make everything as simple as possible. Aside from querying Azure Active Directory and Power BI, the program does not read or write any other information, except for displaying it to the console. As such, it has minimal dependencies.


When run, the application prompts for whether you’d like to perform an interactive authentication (recommended) or use the values which were stored in the source file when compiled. Once authentication credentials have been entered (which are sent directly to Azure Active Directory) the program sends the “Get Workspaces” command to the Power BI REST API, receives the result JSON file, de-serializes it into individual pieces of data, and outputs the data to the screen.

Utilizing the sample above, its possible to expand much further into many of the other areas of the Power BI Service (Datasets, Data Sources, Apps, Gateways, and more) and build out a robust inventory collection system. See my GitHub for more information on this in the future.
Update 11/18/2021 — Make sure to check out two new parts (part 1 and part 2) which I’ve added onto this series which cover authenticating with an SPN (instead of a Username and Password) and authenticating with the MSAL library instead of the (now deprecated) ADAL library.
Resources
- Power BI API PowerShell Sample Script
- Power BI API C# Sample Console Application
- Power BI API Reference
- Power BI Azure Active Directory Application registration instructions
- Power BI App Registration Tool
Posts in Series
- Getting Started with the Power BI API – Querying Power BI with PowerShell
- Getting Started with the Power BI API – Querying the Power BI REST API Directly (with C#)
- Power BI On-premises Gateway Cluster Monitoring (Power Platform API)
- Power BI – Granting Permission to a Custom Application in Azure Active Directory (App Registration)
- Power BI API – Usage Monitoring – Activity Log (Audit Log) Activity Event Data
- Power BI API – Usage Monitoring – Tenant Usage Data with Power BI Activity Log (C# and PowerShell)
- Power BI API – Usage Monitoring – A Power BI Report for Tenant Usage Data
- Authenticating to the Power BI REST API with C# via SPN (Part 1 – Cloud Setup)
- Authenticating to the Power BI REST API with C# via SPN (Part 2 – C# Application)