
A few years ago, I explored connecting to the Power BI REST API with a simple C# console application to retrieve metadata (such as a report inventory and usage information) in my post here.
In order to utilize the Power BI API, you must authenticate to it. In my post, I explored authenticating with a standard username and password. So long as you are not using multi-factor authentication (MFA), this is functional (but not necessarily the best security). If you have MFA enabled, then you cannot use a stored username and password in this manner, so we need another solution. Enter SPN authentication.
The Power BI API initially didn’t have great support for SPN authentication (basic functionality entered Preview in February of 2019), but it has improved greatly over time and is now at the point where it is very usable by custom applications that wish to read data from the API. There are a few extra configuration steps which are necessary in order to get this setup which I’ll cover below.
Configuring Power BI / Azure AD
1. Follow the steps in my previous post to create an Application within Azure Active Directory and grant it permissions to Power BI.

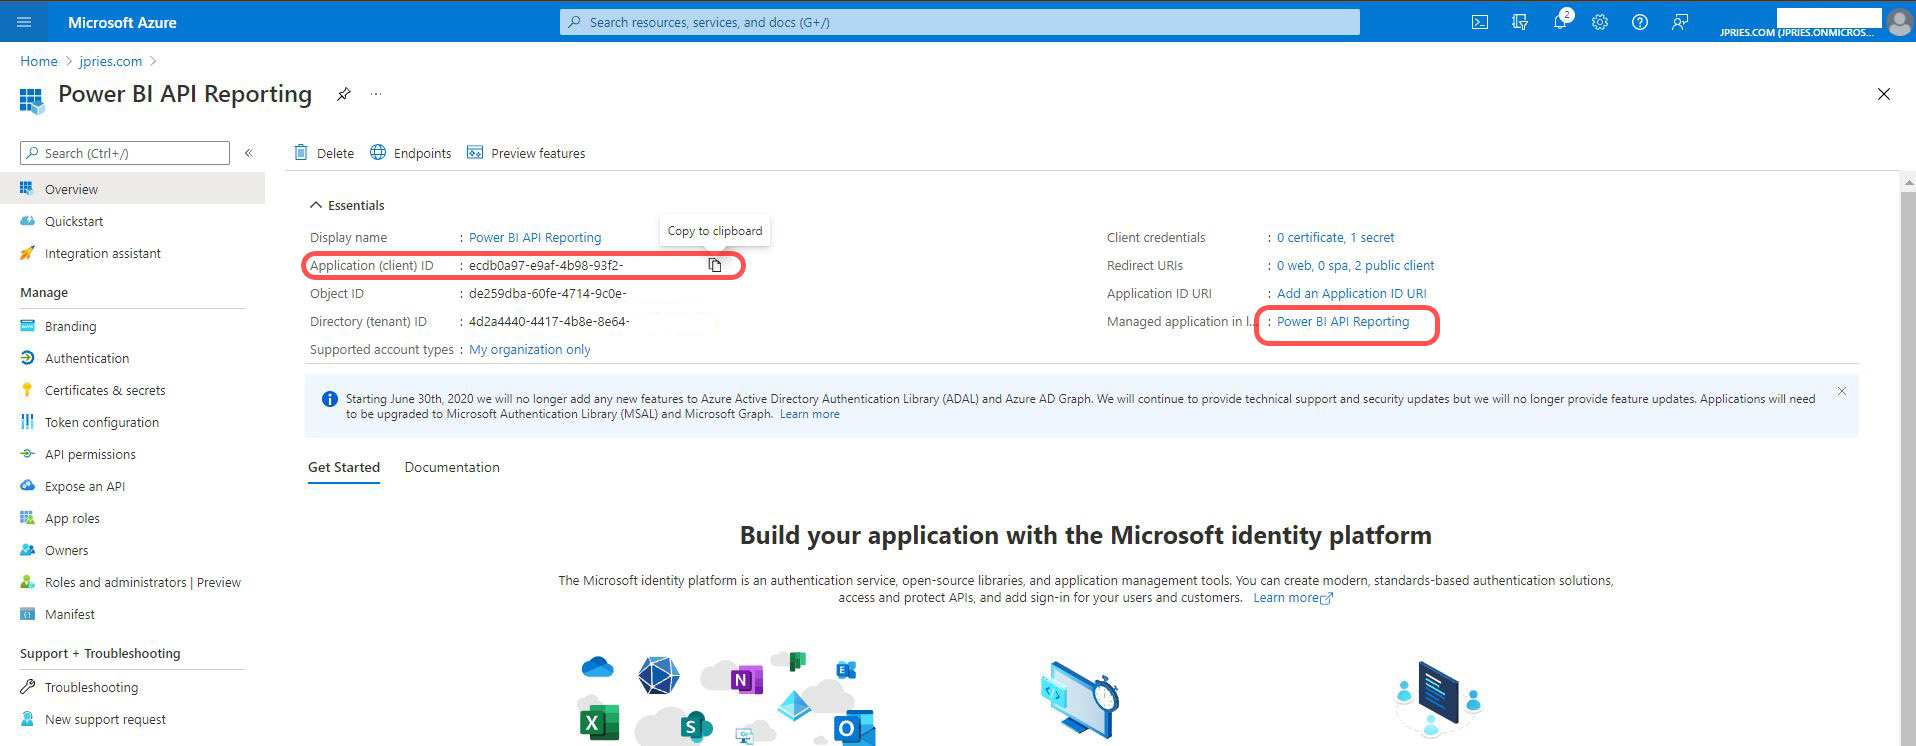
– View your application in the Applications section of Azure Active Directory and make a note of the Application (client) ID unique identifier.
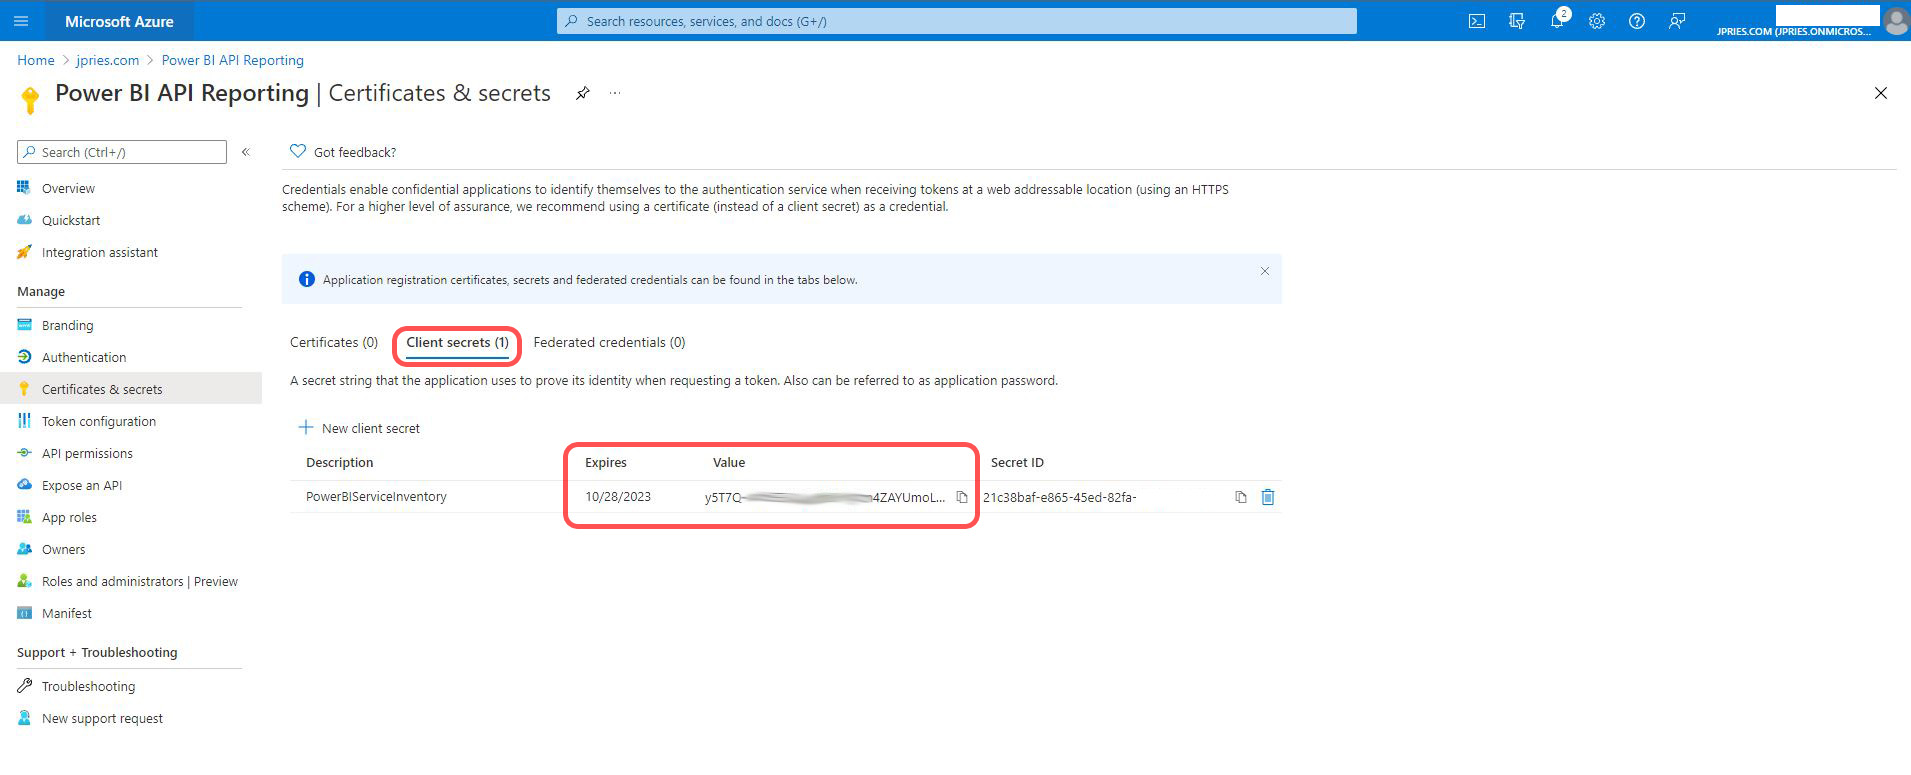
– In the “Certificates & secrets” section check if you have a client secret created. If not, use the New client secret button to create one.
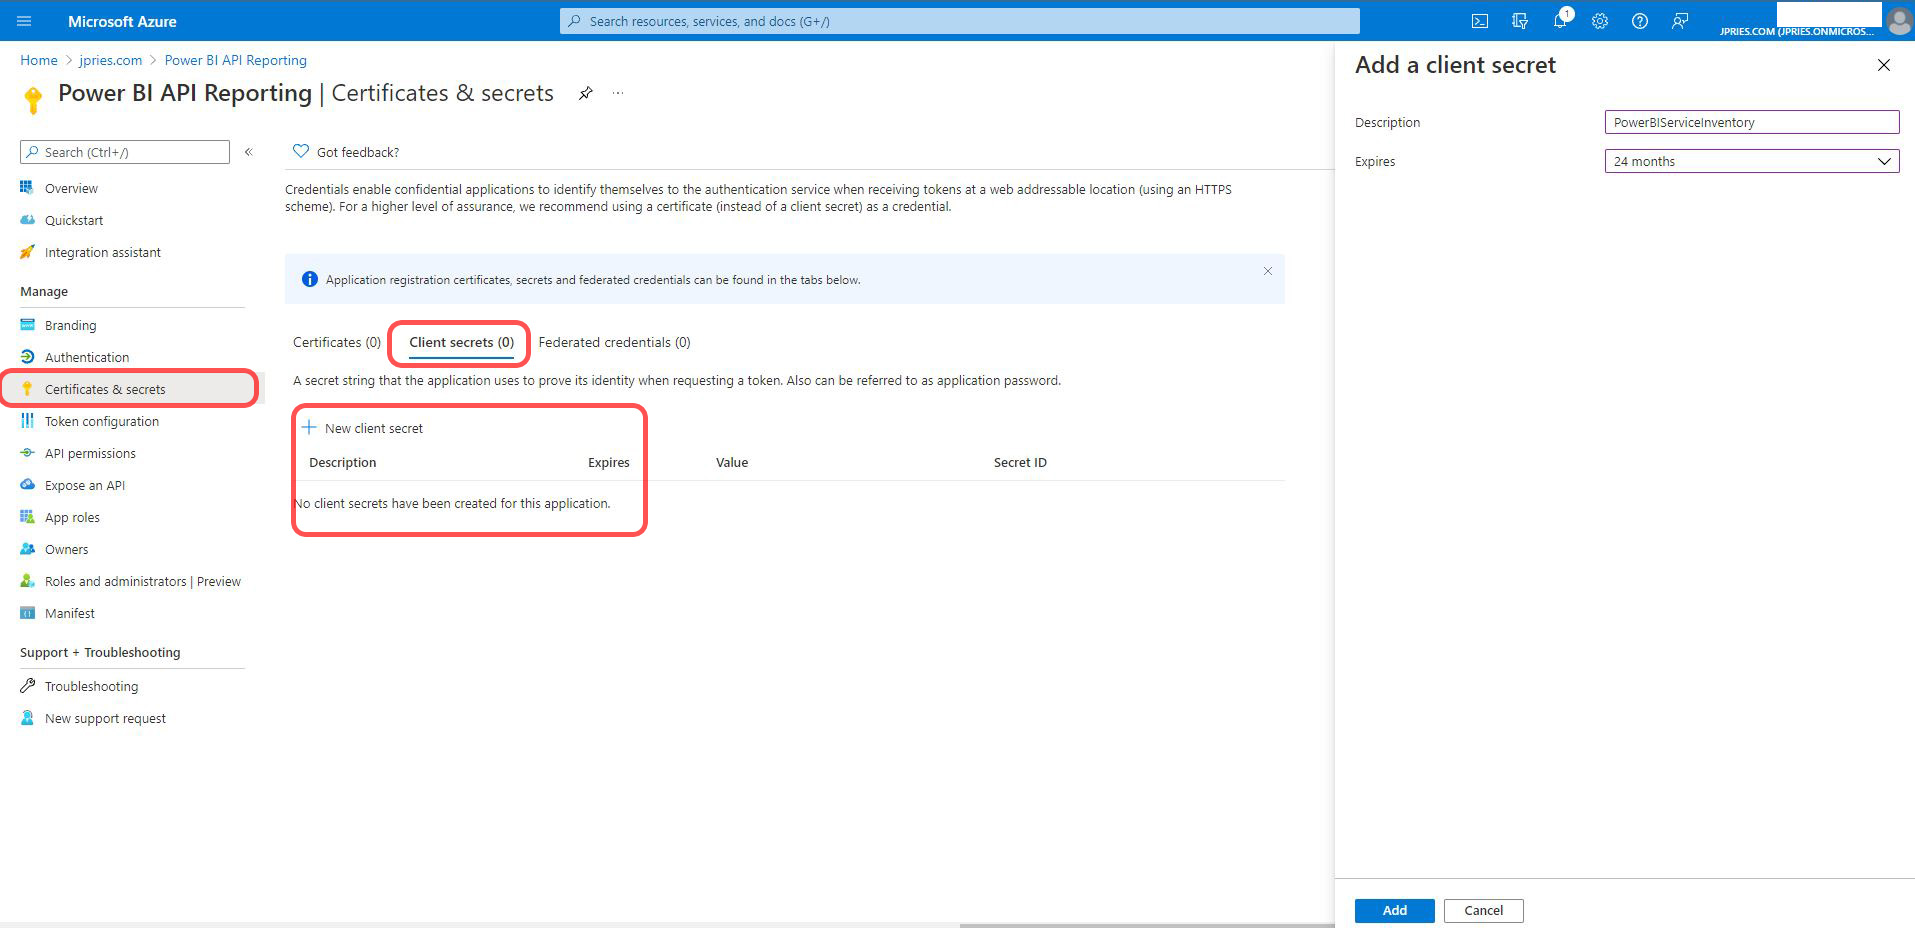
– Make a note of the client secret Value field. This will be a string of random numbers, letters, and symbols. It will not be a unique identifier.
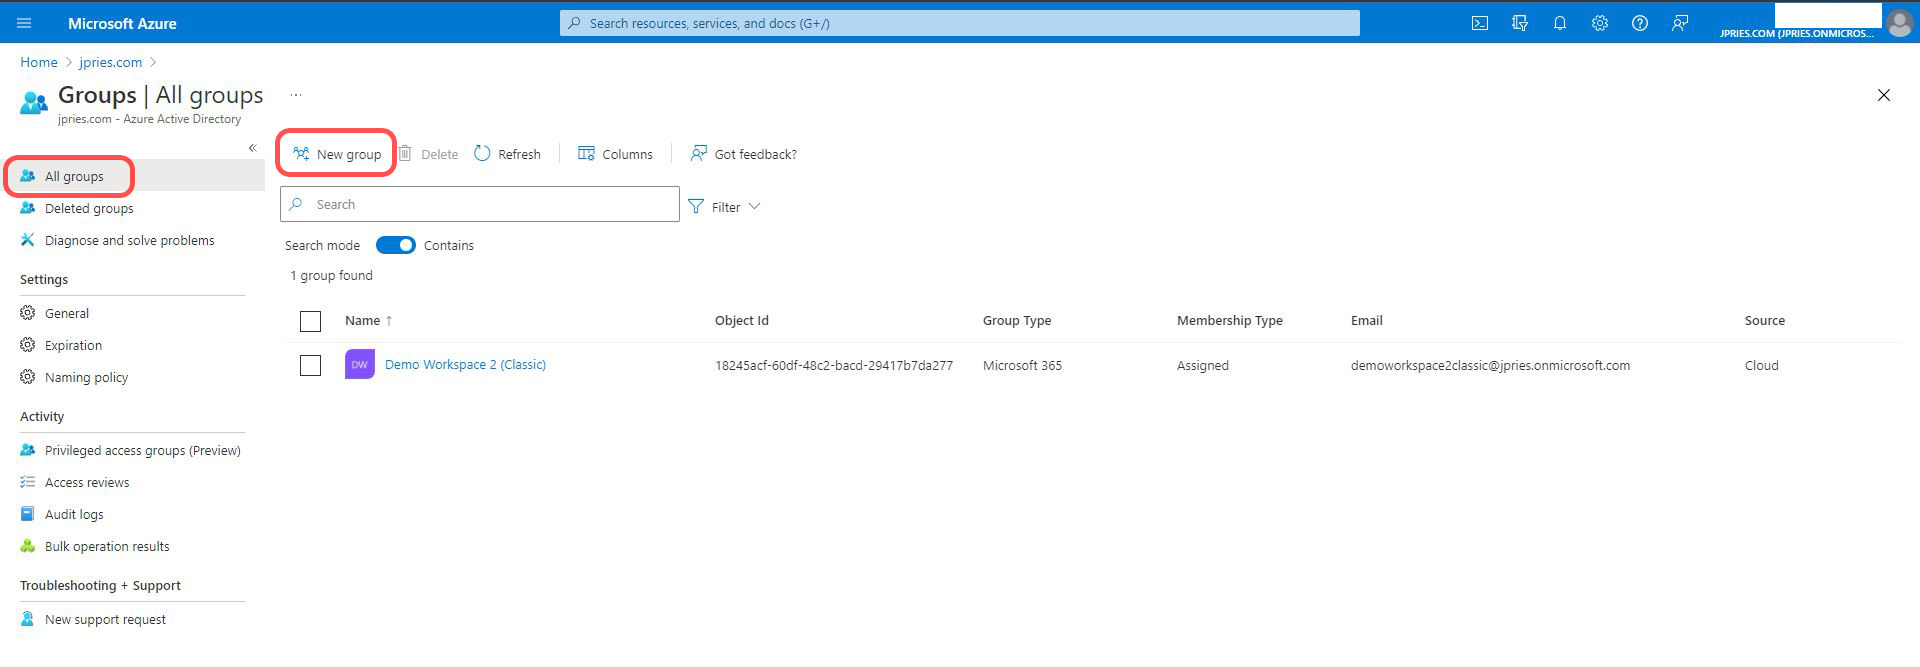
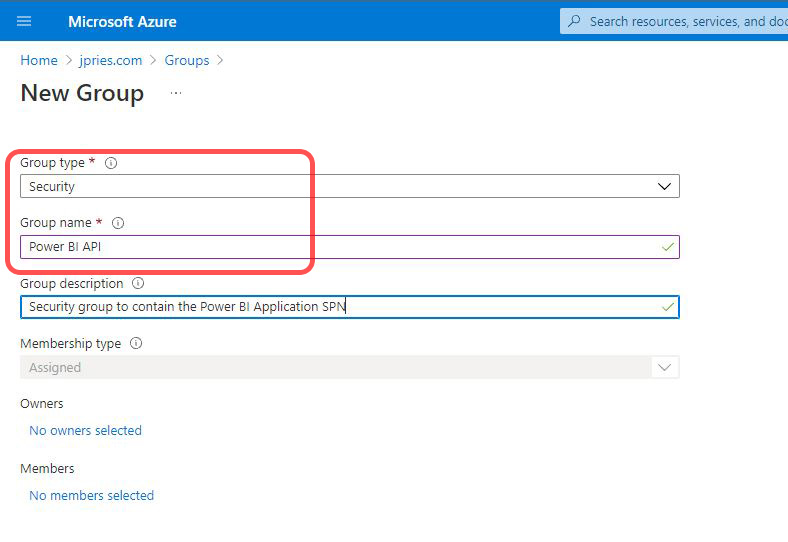
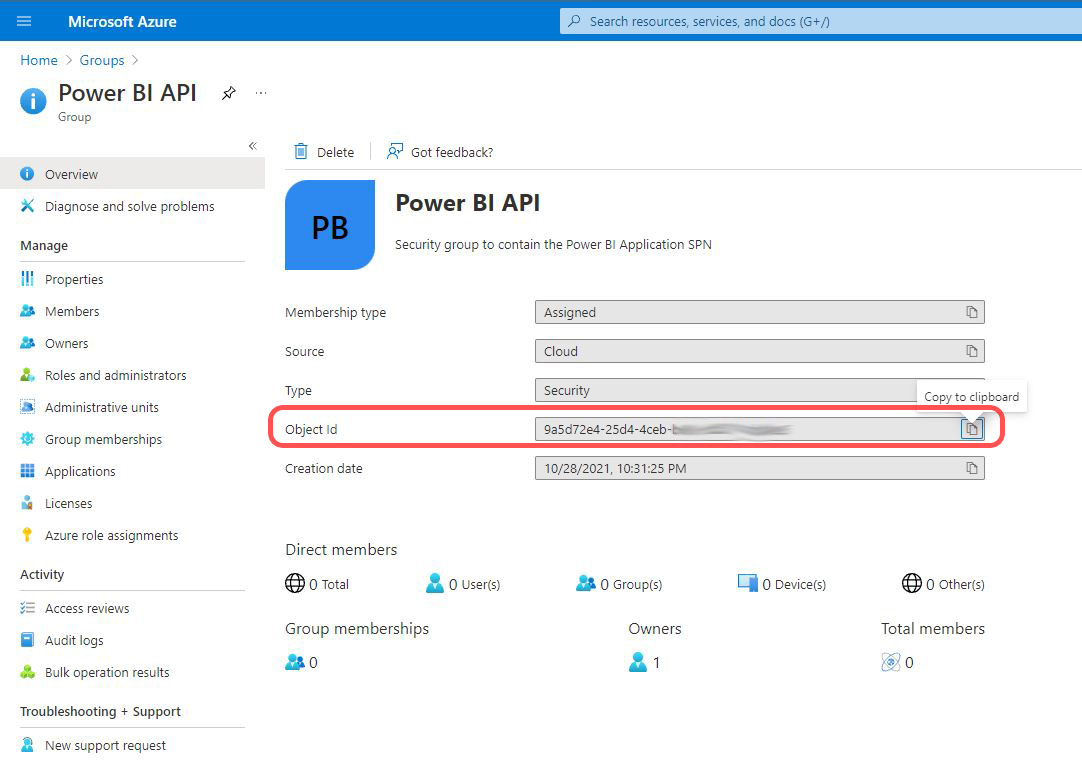
2. Create a new security group in Azure Active Directory. If this is in an organization that has on-premise Active Directory integration, this will probably need to be a standalone cloud security group.
- Make a note of the group’s Object ID
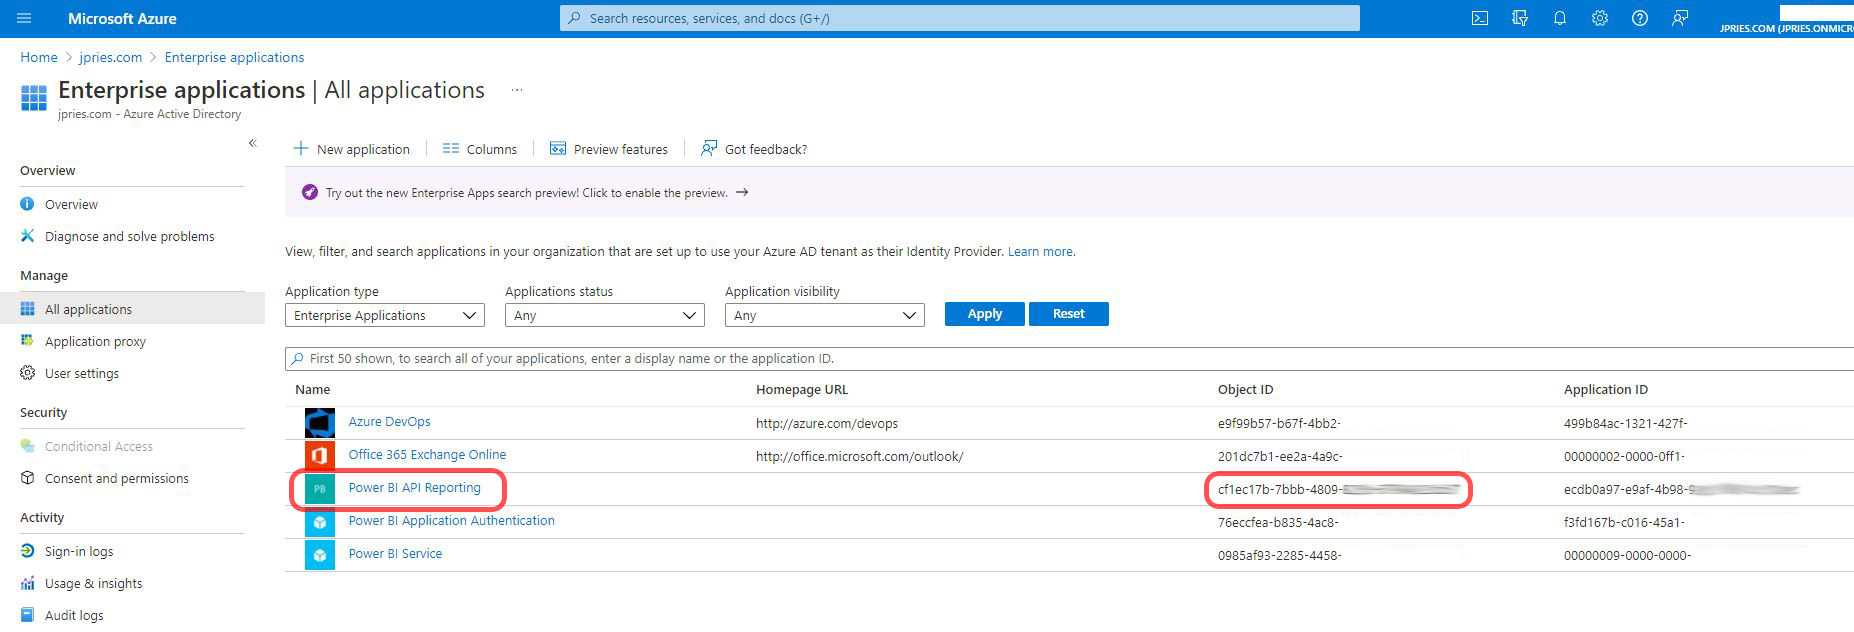
3. Next, you will need to get the Object ID of the SPN for the Application. Note that this is not the Object ID of the Application itself (I found this part a bit confusing). You can get to a screen showing the SPN’s object ID via one of two ways (both will give you the same value, just different clicks to get there). Either
- Go to the Application in Azure Active Directory and then click on the Application’s name in the “Managed application in…” section in the upper right of the screen.
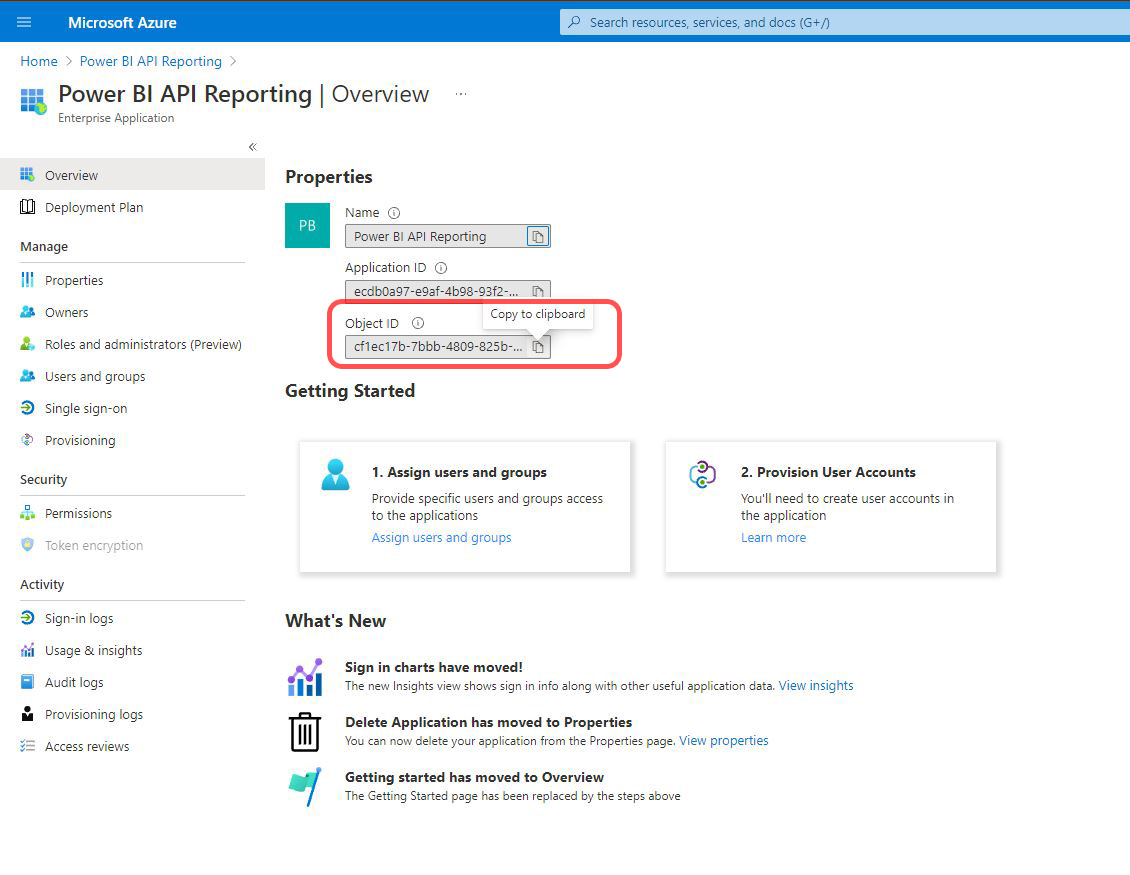
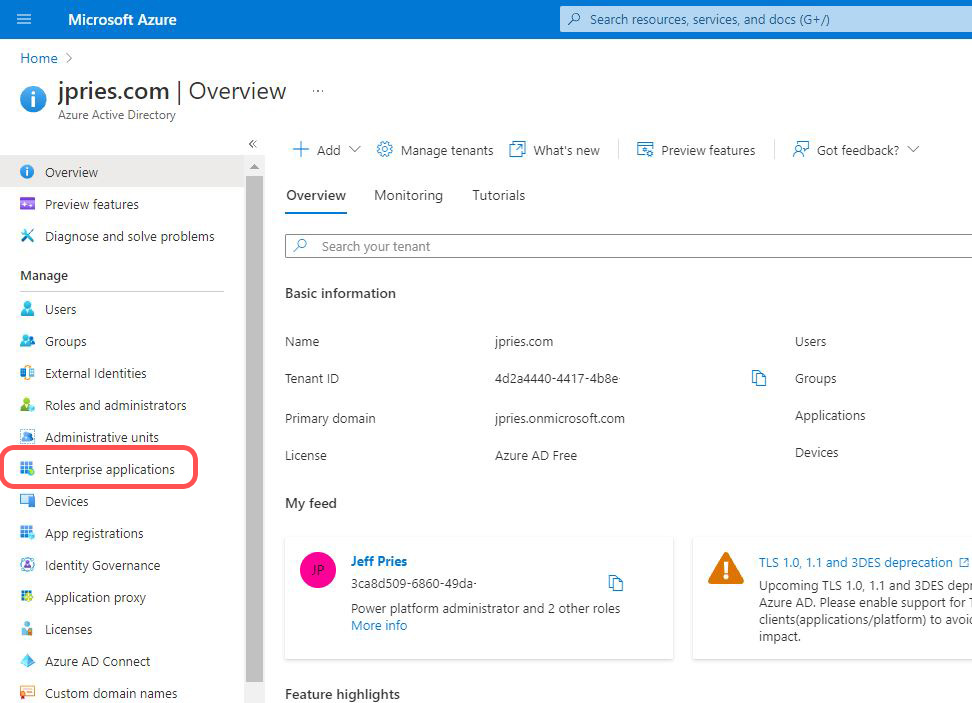
- Or, in the main Azure Active Directory menu, click on the Enterprise applications menu item, then find your application and get the unique identifier from the “Object ID” column (not the “Application ID” column)
4. Next, we need to add the Application’s SPN to the newly created Azure Active Directory security group. There may be a way in the GUI to do this (if so, I’m not familiar with it), but the easiest way is going to be via a PowerShell command.
- Launch PowerShell as an administrator (right click, run as Administrator)
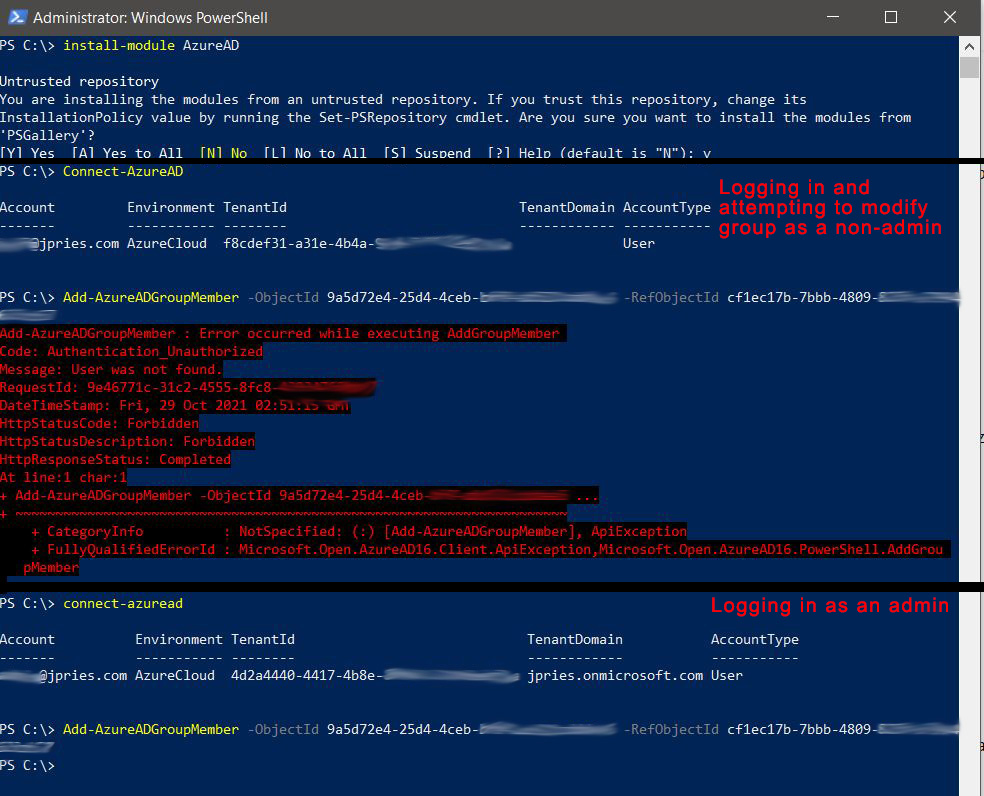
If this is your first time interacting with Azure Active Directory with PowerShell, you’ll need to install the Azure Active Directory PowerShell modules. Do this by running the command:
Install-Module AzureAD
With the Azure Active Directory PowerShell modules installed, you can now connect to Azure Active Directory. Run the following command to authenticate to the cloud. When authenticating, make sure to log in with an account that has Azure AD administrative access to add/remove users from groups. If not, you will get an error when we run the group membership command.
Connect-AzureAD
Finally, we can run the command to add a member to the group. The command to run is:
Add-AzureADGroupMember -ObjectId GroupObjectID -RefObjectId ApplicationSPNObjectID
(where GroupObjectID and ApplicationSPNObjectID are the values you gathered above)
If the command is successful, you won’t get any output.
5. Still in PowerShell, you can confirm the group membership change was successful with the following command:
Get-AzureADGroupMember -ObjectID GroupObjectID

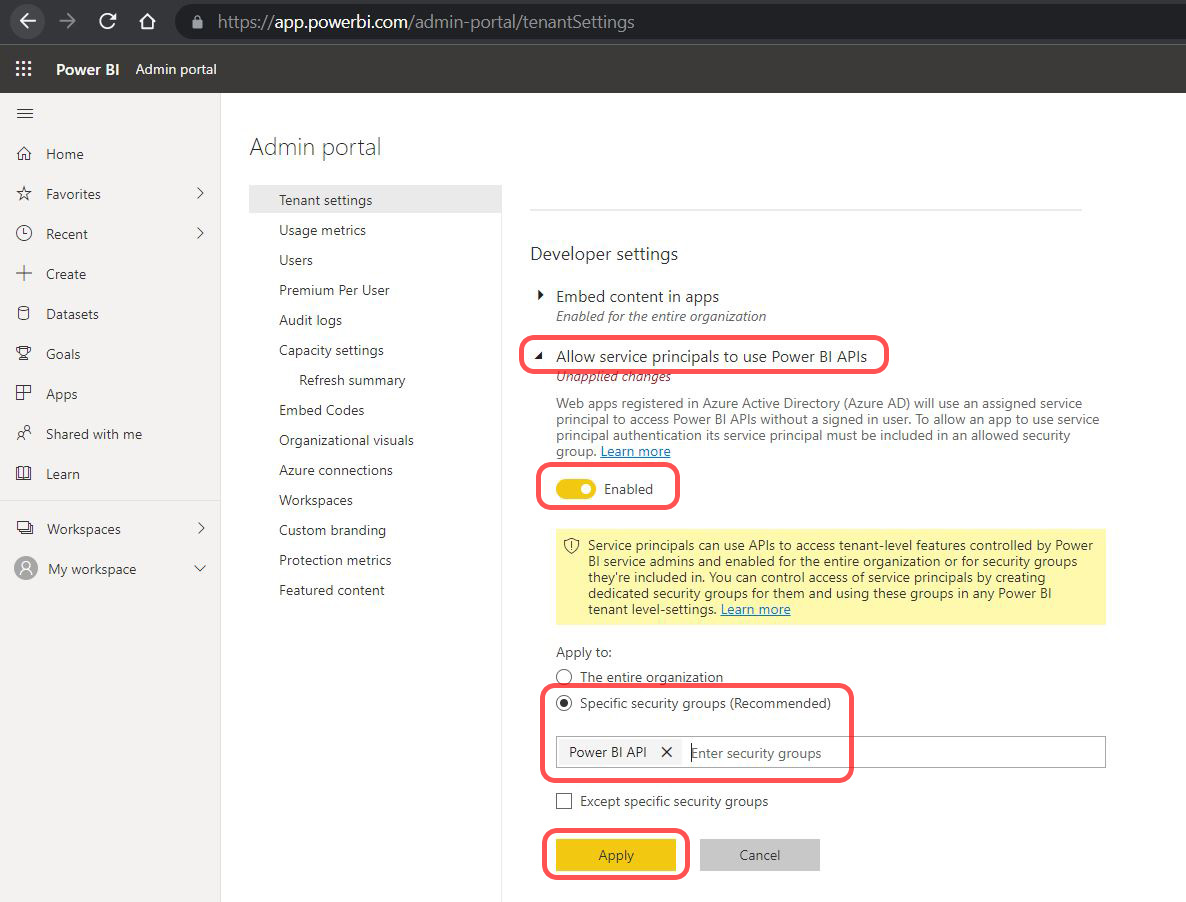
6. With the Application successfully added to a security group, we can now make the final configuration change, which is to grant some additional permissions to the group. This is done via the Power BI Admin Portal, accessed while logged into Powerbi.com as a Power BI Administrator.
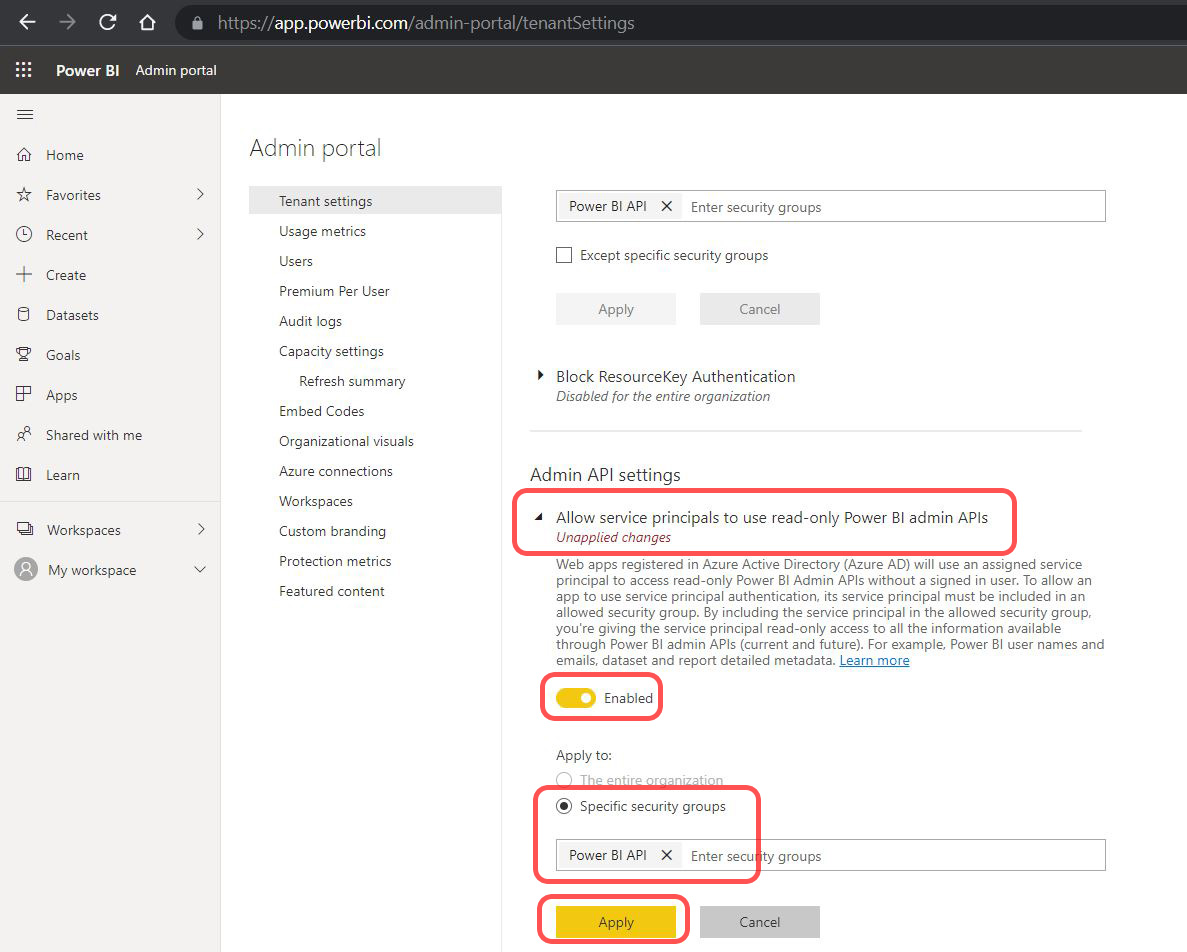
There are two settings which will need to be enabled. These settings will allow all members of your newly created group (the Azure AD Application that you created) the ability to use the Power BI Admin API in read-only mode (necessary to be able to read Power BI metadata for the organization). The two settings are:
- Set the Developer Settings -> Allow service principals to use Power BI APIs to enabled for this new group
- Set the Admin API settings -> Allow service principals to use read-only Power BI admin APIs to enabled for this new group
Conclusion
After saving these settings, you should now have an Azure AD Application that has the ability to call the Power BI Admin API for reading metadata. In the next part, “Authenticating to the Power BI REST API with C# via SPN (Part 2 – C# Application),” we’ll authenticate to the API using a C# application and providing the Application ID and Client Secret (from earlier in the page) as authentication credentials.
In the application, we’ll be using the “Admin APIs” so no further permissions are necessary. That being said, should you wish to use non-Admin APIs, you can grant permissions in Powerbi.com to the security group which you created. For instance, you could add the security group as a member of an individual workspace to use the standard workspace API.
Resources
- Getting Started with the Power BI API — Querying the Power BI Rest API Directly (with C#)
- Power BI – Granting Permission to a Custom Application in Azure Active Directory (App Registration)
- Authenticating to the Power BI REST API with C# via SPN (Part 2 – C# Application)
- https://www.datalineo.com/post/power-bi-rest-api-with-python-and-msal-part-ii
- https://www.1clickfactory.com/blog/how-to-authenticate-through-azure-active-directory-to-use-business-central-api/